
About AWS Inspector
AWS Inspector is an automated security assessment service that helps improve the security and compliance of applications deployed on AWS. Amazon Inspector automatically assesses applications for exposure, vulnerabilities and deviations from best practices. After performing an assessment, it produces a detailed list of security findings prioritized by level of severity. These findings can be reviewed directly or as part of detailed assessment reports which are available via the Amazon Inspector console or API. Amazon Inspector security assessments help you check for unintended network accessibility of your Amazon EC2 instances and for vulnerabilities on those EC2 instances. Amazon Inspector assessments are offered to you as pre-defined rules packages mapped to common security best practices and vulnerability definitions. These rules are regularly updated by AWS security researchers.
What are the different Assessment Types?
The Network Assessment evaluates the EC2 instance protections for Internet ‘visible’ ports, i.e. for ingress from points outside the VPC. This type of assessment cannot examine the EC2 instance by itself, unless the optional agent is installed. The Host Assessment is significantly more thorough as it evaluates the EC2 instances for vulnerable software (CVE), systems hardening (CIS) and security best practices. The agent can be installed using the AWS Systems Manager for enterprise-scale (formerly EC2 Systems Manager or SSM), or manually on each instance.
The Amazon Inspector Nomenclature
Amazon Inspector agent: Inspector agents are installed on the EC2 instances. These agents collect the data associated with installed software and send it to AWS Inspector services. Note: This will not find any vulnerable codes if your application is infected. Assessment target: A set of EC2 instances that you want to assess for vulnerability. Targets can be identified by unique tags. Rules and Rules package: Checks are performed on the IT resources based on certain rules. In the context of Amazon Inspector, a rule is a security check that Amazon Inspector performs during the assessment run.
- Network Reachability
- Common vulnerabilities and exposures
- Centre for Internet Security (CIS) Benchmarks
- Security best practices for Amazon Inspector
Findings: Findings are the potential security issues discovered by the Inspector. Findings are displayed on the Amazon Inspector console or fetched through the API.
How to install the Inspector Agent
Agents collect the data(behavioral and configurational), and pass them on to Amazon Inspector for further analysis. Installation of an agent in Linux is a very simple process. As of this writing, agent installation using the Systems Manager Run Command is not currently supported for the Debian operating system. To use this option, make sure that your EC2 instance has the SSM Agent installed and has an IAM role that allows Run Command. The SSM Agent is installed by default on Amazon EC2 Windows instances and Amazon Linux instances. Amazon EC2 Systems Manager requires an IAM role for EC2 instances that process commands and a separate role for users executing commands. Download agent from the following paths: Linux based:
Or
Windows based: https://inspector-agent.amazonaws.com/windows/installer/latest/AWSAgentInstall.exe To install, run: $ sudo bash install
Configure Amazon Inspector
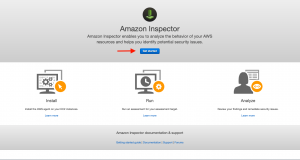
Step 1: Click on Get started
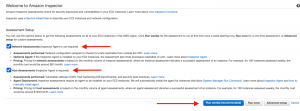
Step 2: You can leave the default options checked and click on any run options from below as per your requirement. For this walkthrough, we have opted for Advanced setup.
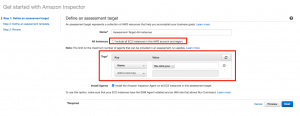
Step 3: Here, Amazon Inspector has an option to run on all the Instances that are present in your account and region. If you want to run for a standalone instance or a specific set of instances, use EC2 tags to segregate them. We can also install Inspector agents using SSM from this window for all instances. As a prerequisite, make sure that SSM agents are already installed and EC2 has the appropriate IAM rights for the same. 
For Standalone/tag based assessment, run:
Step 4: Define Rules packages. By default, certain packages are selected. If needed, you can remove the rules by clicking the ‘X’ mark. This window also gives a provision to set a schedule for further recurring scans. 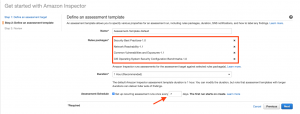
Step 5: Once verified, click on Create to start the first assessment run. Once done, you will get a success message as shown below.
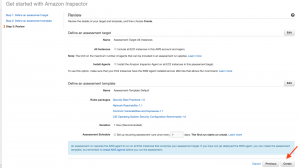
Success Message:

Step 6: You can verify the assessment run by clicking Assessment templates from the navigation option.

Step 7: After about an hour, you should be able to see the findings under the Findings option. You can also segregate findings based on severity.
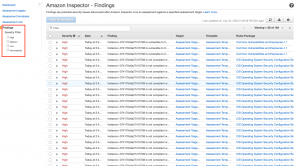
Dashboard View
You can also get a consolidated view from the Dashboard option.

Pricing
Amazon Inspector is a “pay for what you use” service like the vast majority of those provided by AWS. Amazon Inspector is free for up to 250 agents for the first 90 days. After 90 days, the pricing changes. Please refer here for details. Possible scenario: Suppose you have 10 Amazon EC2 instances in your assessment target with the Inspector Agent installed on each instance In this example, you would be billed for 10 host agent-assessments and 10 network reachability instance-assessments. The Amazon Inspector charges for your account, for this billing period would be: For host assessment rules packages: 10 agent-assessments @ $0.30 per agent-assessment For network reachability rules package: 10 instance-assessments @ $0.15 per instance-assessment When you add them up, the Amazon Inspector bill would be $3.00 for host agent-assessments and $1.50 for network reachability instance-assessments for a total of $4.50.


